Photomerge Assignment


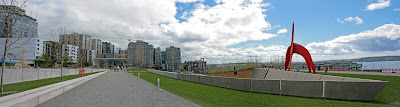
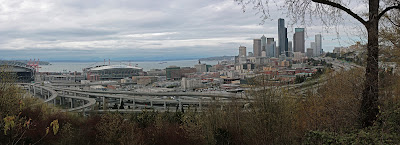
Your assignment over the next week is to take multiple panorama style photomerges. Take a picture and then move the camera slightly up or sideways to take another "connected" image. Basically you combine smaller pictures to make one larger picture.
Use a tripod if possible. Remember to manual adjust white balance or select something like "cloudy" or "sunny" on your camera.
Here is how you connect multiple pictures in Photoshop.
To set up a new Photomerge composition:
Import Photos
Place pictures in a separate folder for each merge
Do one of the following:
Choose File > Automate > Photomerge.
In the File Browser, select the images you want to use and then choose Automate > Photomerge from the File Browser menu bar
In the dialog box, choose an option from the Use pop-up menu:
- Files to generate the Photomerge composition using individual files.
- Folders to use all the images stored in a folder to create the Photomerge composition. The files in the folder appear in the dialog box.
- Open Files to use the image files you have open in Photoshop.
Then edit your picture as you need.
Here is a tutorial you can use to get you going.
http://www.youtube.com/watch?v=qrNI-gAuI5s
Tentative schedule
Wednesday January 13: Practice at school up by the track,the front of the school or Hamlin. Take seven different photomerges comprised of 3-9 pictures each. Turn in Photomerge Practice Contact Sheet.
Merge your pictures in Photoshop using the directions above.
Friday January 15: All period off-campus shooting day. Pick an amazing location and shoot seven photo merges consisting of 3-9 pictures each. Turn in Photomerge CS1. These pictures will not be merged together.
Weekend Homework: Go to one landscape location and shoot seven different photo merges consisting of 3-9 pictures each. Turn in Photomerge CS2. These pictures will not be merged together.
Wednesday January 20: All period off-campus shooting day. Pick an amazing location and shoot seven photo merges consisting of 3-9 pictures each. Turn in Photomerge CS3. These pictures will not be merged together.
Friday January 22: Photomerge editing.
